How to Monitor a Page for Price Changes
Learn how to track price changes on a webpage effectively
09 June, 2024

Monitoring a Page for Price Changes
Price monitoring is a crucial aspect of running an e-commerce business or even being a savvy consumer. It helps you stay competitive, optimize revenue, and build customer trust by ensuring that your prices are always aligned with market conditions. However, manually monitoring prices on your website or across various platforms can be time-consuming and error-prone. This is where automated price monitoring tools like WebMonitors.io come into play.
Why Monitor Price Changes?
But before we move on to the part where we discuss how to monitor price changes, let's understand why it is essential to monitor price changes on your website:
- Competitive Pricing: As we know consumers are price sensitive so keep your prices on the competitive edge that is not too high or too low compared to other competitors.
- Customer Trust: When customers see that the prices are consistent, they trust the brand more.
- Revenue Optimization: By monitoring price changes, you can optimize your revenue by adjusting prices based on demand and competition.
How to Monitor Price Changes Effectively
Monitoring price changes can be done manually, but that method is often inefficient and prone to errors. Instead, leveraging automated tools like WebMonitors.io can streamline the process. Here’s a step-by-step guide on how to use WebMonitors.io for monitoring price changes:
Step 1: Sign up and Log in
First, create an account on WebMonitors.io if you haven’t already. Once you’ve signed up, log in to access the dashboard.
Step 2: Create a New Monitor
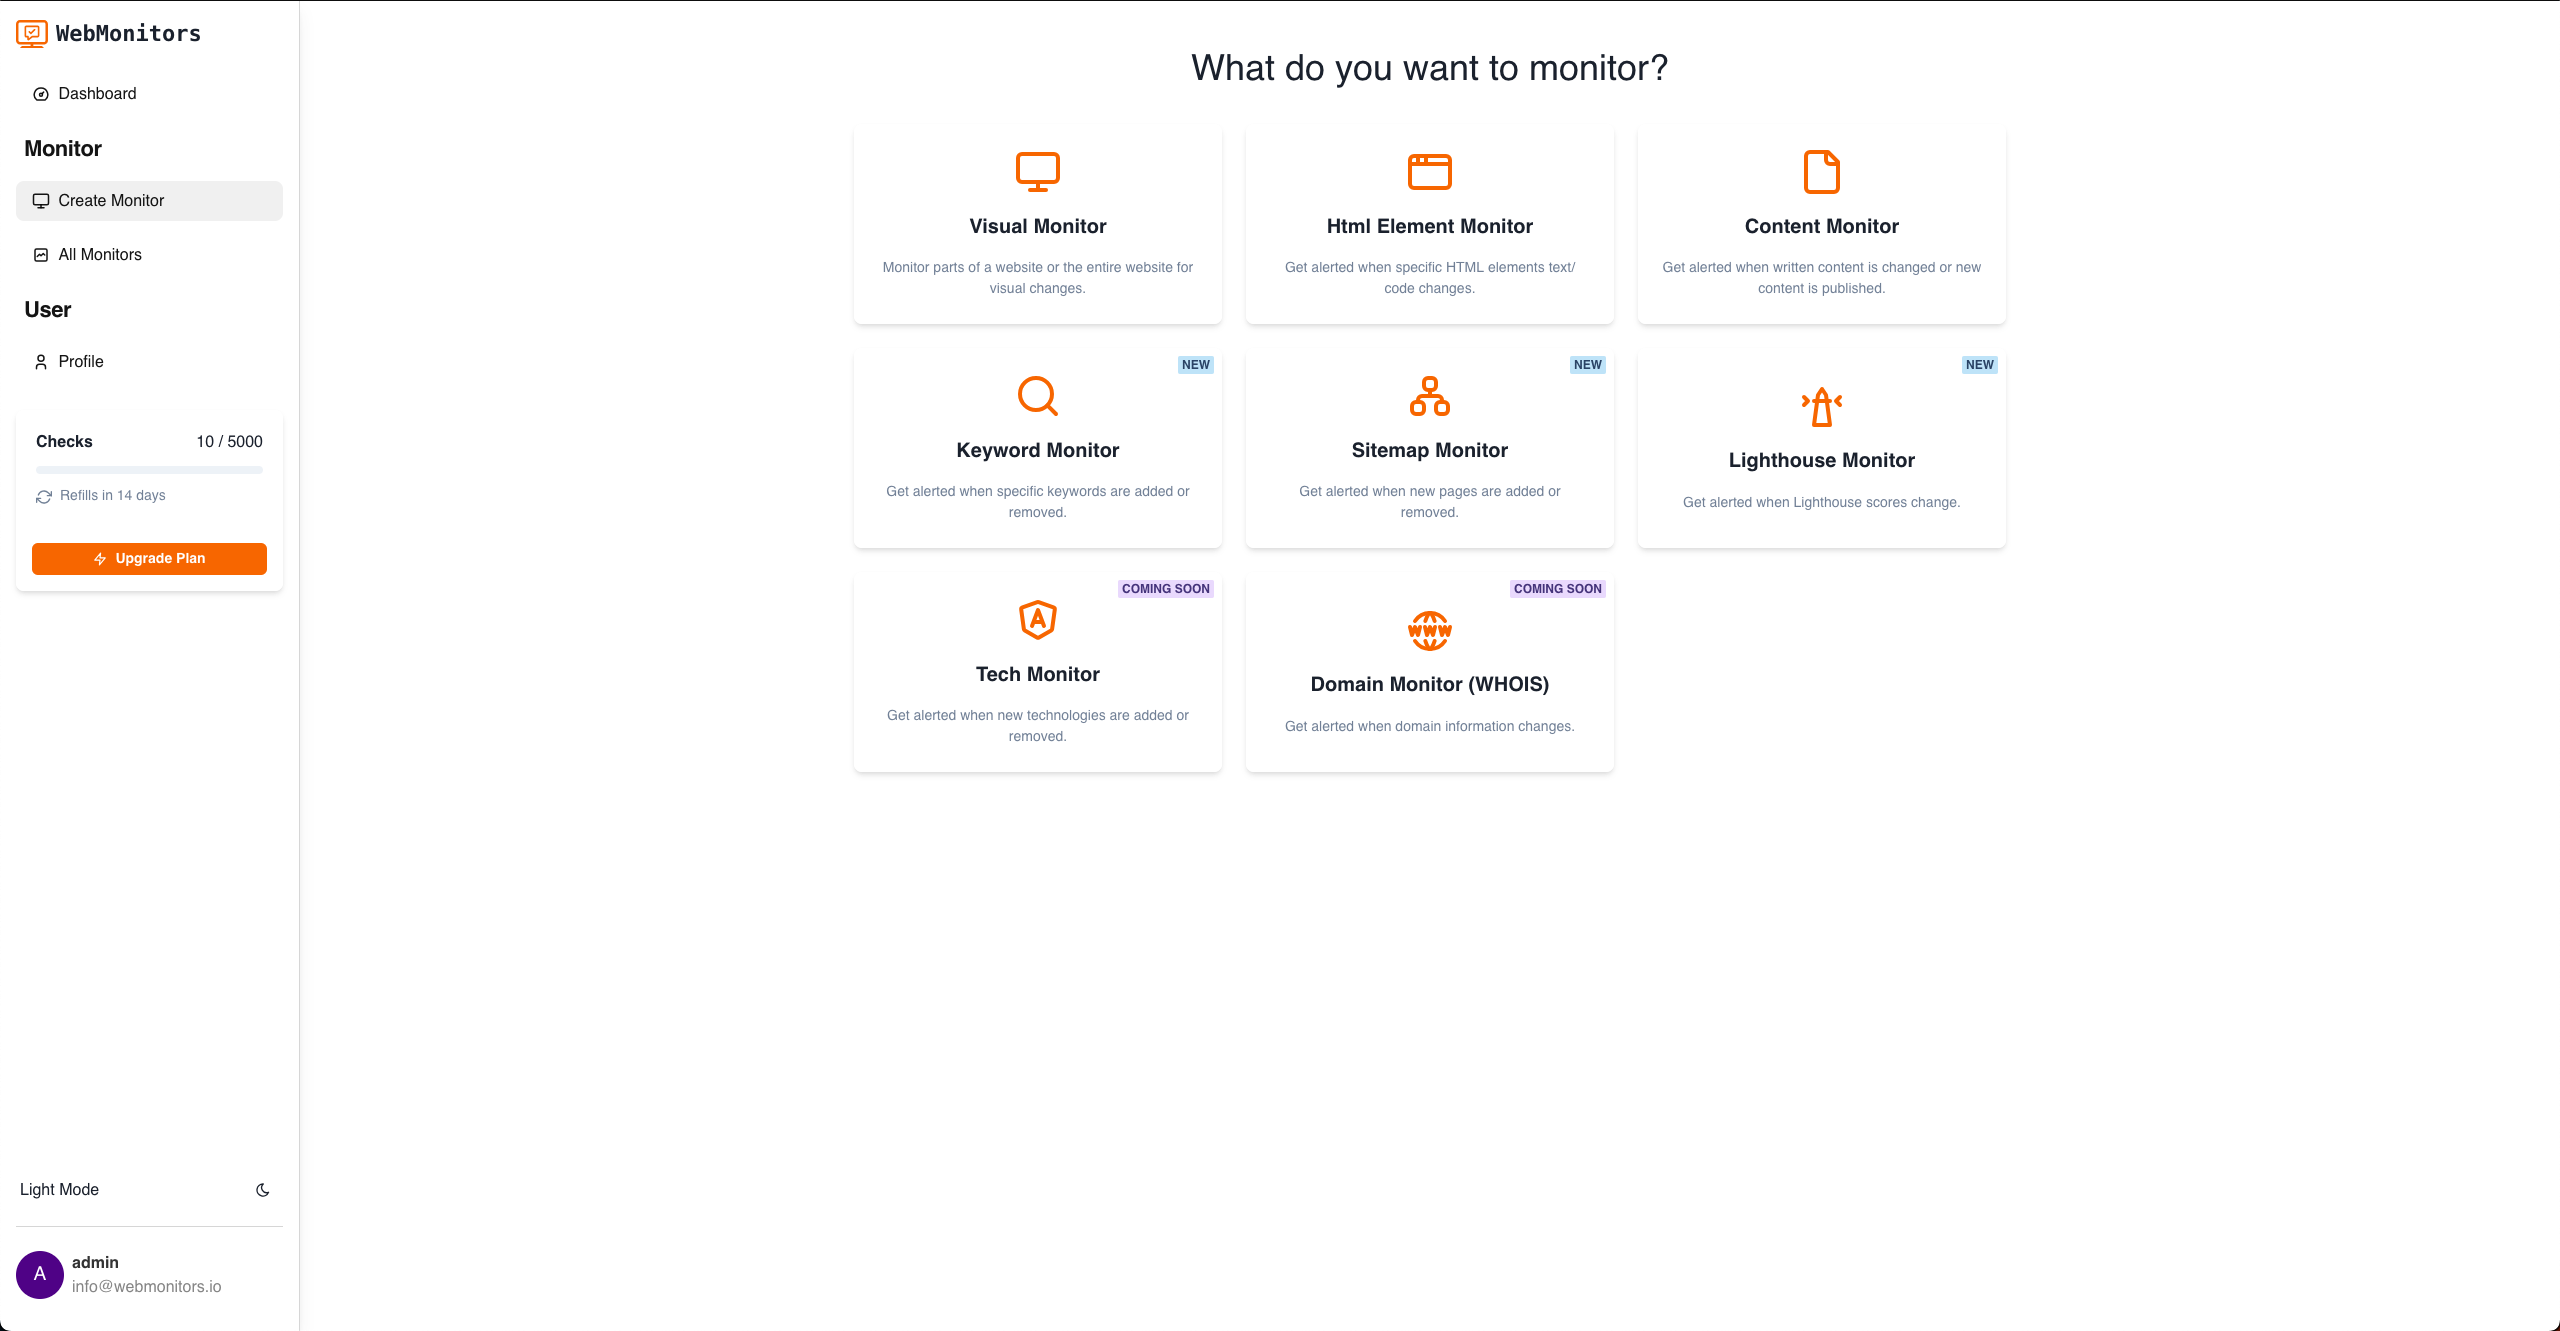
In the create monitor page, select the html monitor.

Step 3: Set up Html Element Monitoring
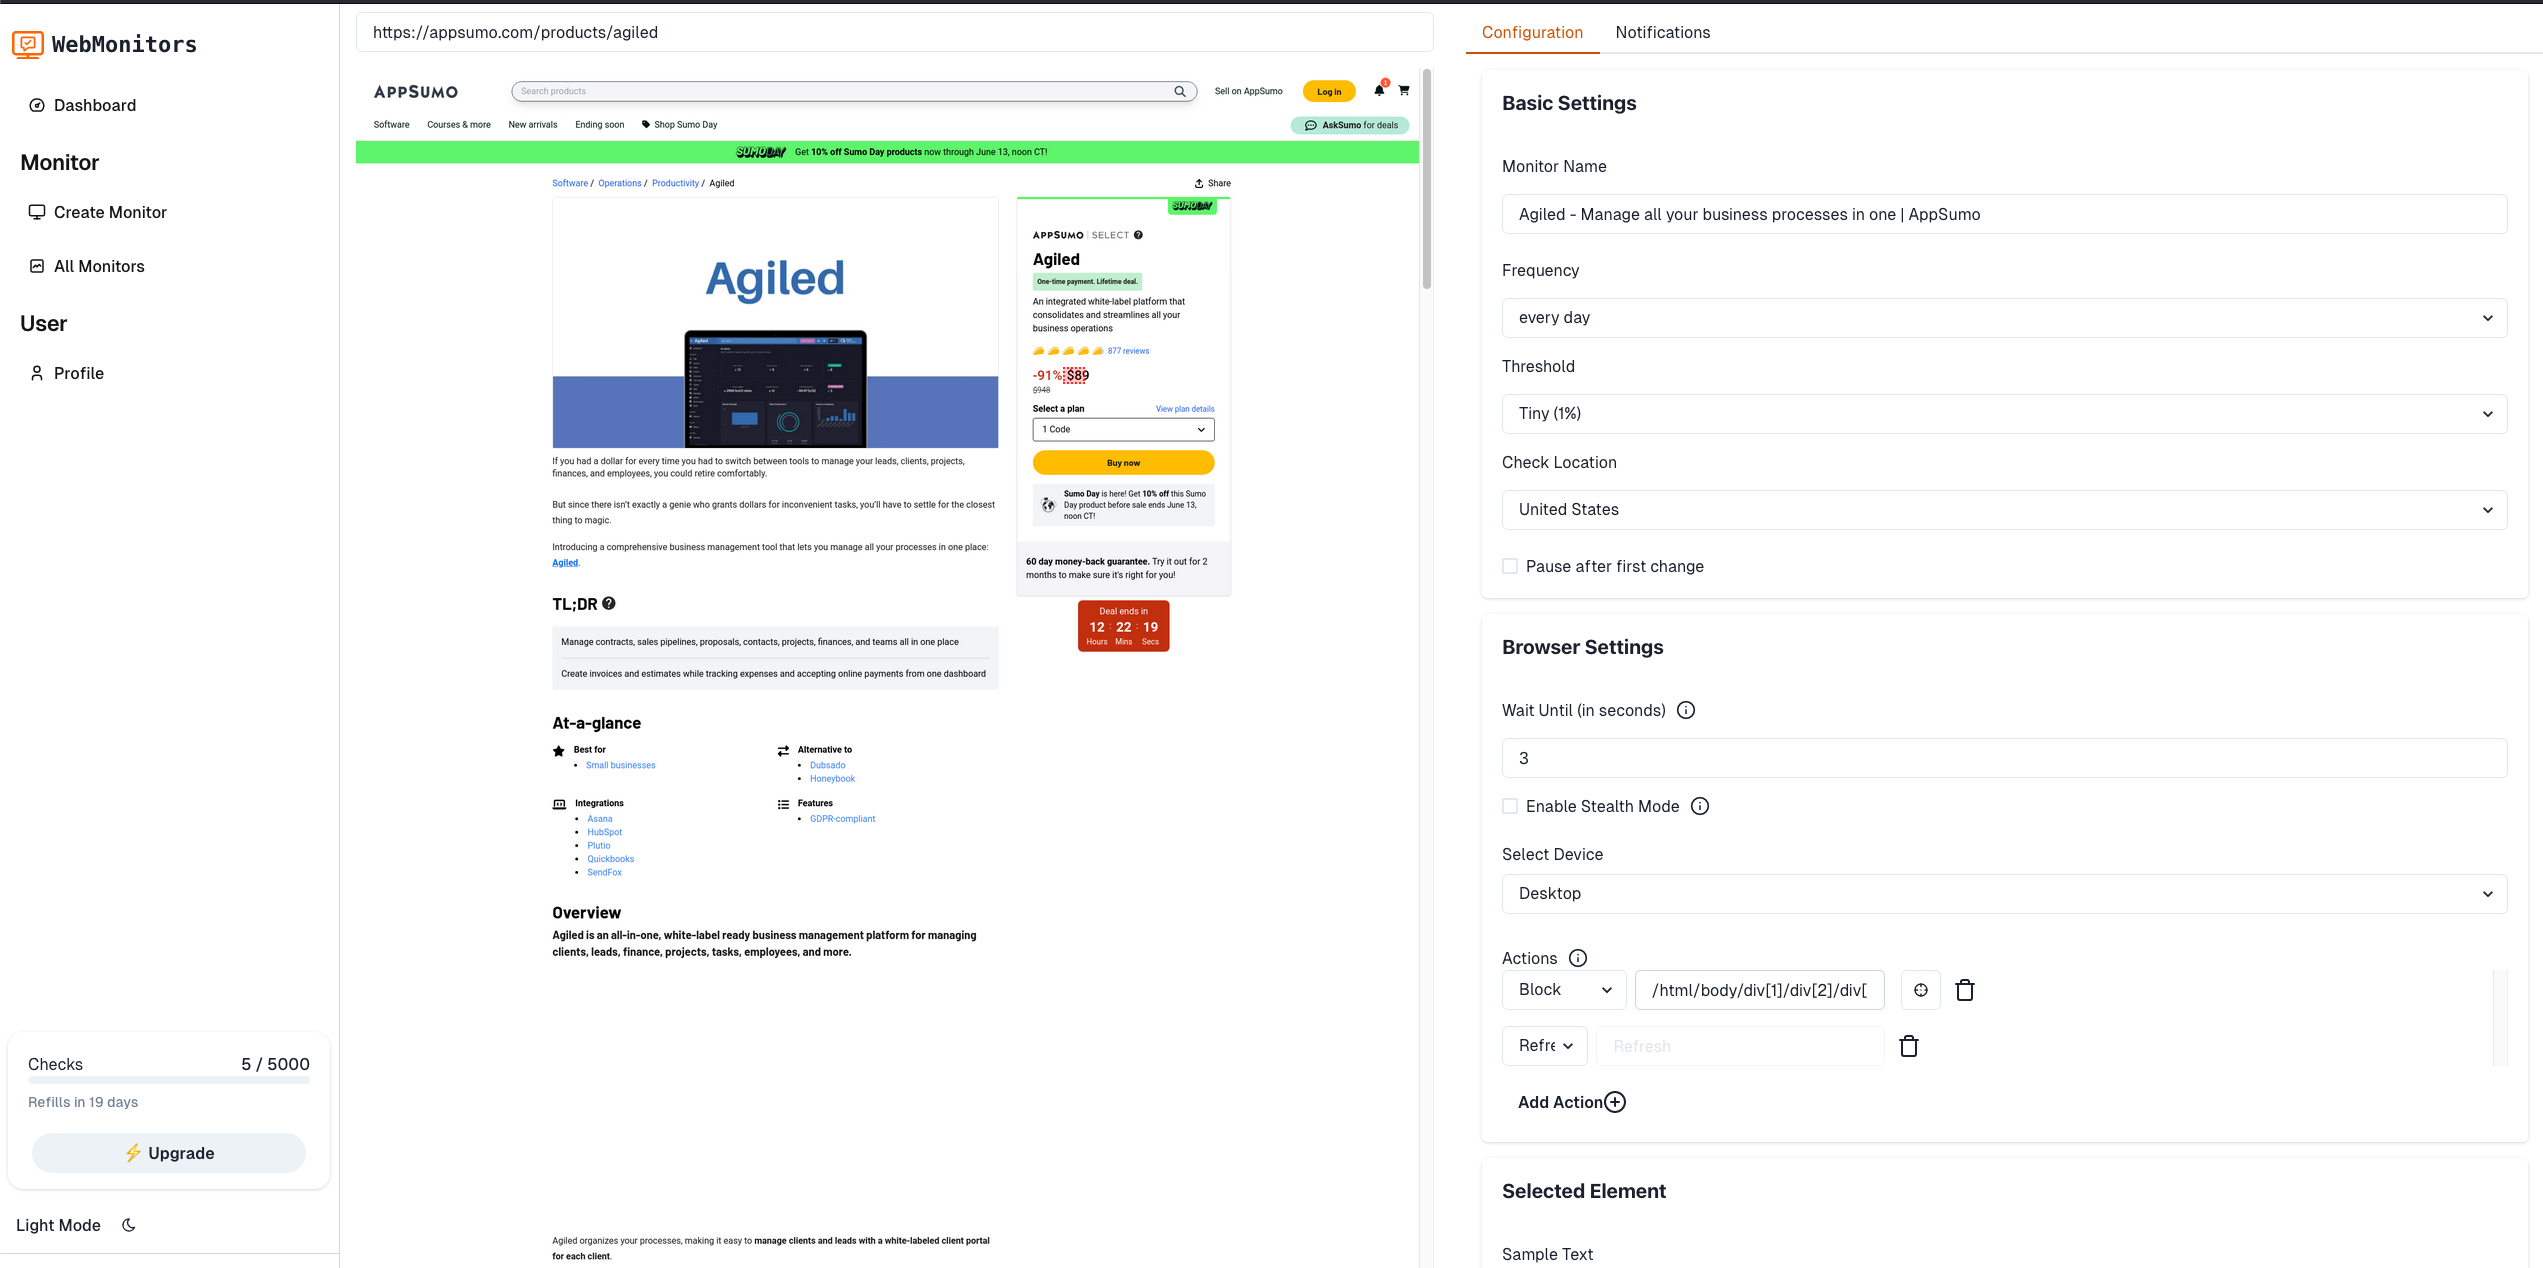
- Enter URL: Enter the URL of the page you want to monitor for price changes.
- Element Selector: Use the built-in selector tool to choose the HTML element that contains the price.
- Update Sensitivity: Choose how changes in the price element should be detected by monitoring.
- Notification Preference: Select how you wish to receive notifications for price changes (Email/SMS/Push).

Step 5: Set the Monitoring Interval
Choose the frequency for WebMonitors.io to check for price changes. This could be set to daily, weekly, or any other preferred frequency.
Step 6: Save and Monitor
Go back over your settings to make sure everything is set up properly. When you're happy with the settings, you can save them and start the monitoring. WebMonitors.io will start tracking the specified HTML element to see if the price has changed.
Step 7: Check Change Reports
WebMonitors.io will provide you with detailed reports on any price changes detected. The tool will show you before and after snapshots, making it easy to see exactly what has changed.
Wrapping up
Automated price monitoring is an indispensable tool for anyone involved in e-commerce or competitive pricing strategies. By using WebMonitors.io's HTML element monitoring tool, you can effortlessly track price changes, make data-driven decisions, and stay ahead of the competition. Sign up for a free trial today and start monitoring price changes effectively.